
Best Hostinger Settings to Maximize Speed & SEO (2025 Guide)
When I first launched my affiliate blog with Hostinger, I was honestly just hoping it would be “good enough.” It was cheap, easy to use, and came with a free domain. But I quickly learned something that surprised me: Hostinger actually has some serious performance tools baked in — if you know where to look.
What Most Beginners Miss About Hostinger
Most new users install WordPress and start writing. That’s it. No settings tweaked, no performance optimizations, and no thought given to SEO technicals. That was me too, until I realized:
My site was loading in 4+ seconds… and the bounce rate was brutal.
That’s when I started digging. And what I found was this: Hostinger’s default setup is okay — but it’s like having a sports car with eco-mode turned on. You’re not using 80% of the power.
The Good News?
Everything you need to improve is already there — you just have to turn it on and configure it properly. No need for expensive plugins or third-party services.
In this guide, I’ll walk you through the exact settings I use across all my affiliate sites hosted on Hostinger to get:
-
Sub-2-second load times
-
Core Web Vitals passed
-
Better rankings from faster SEO pages
-
And fewer plugin headaches
Let’s get started with the first area that makes the biggest difference: LiteSpeed Cache.
The Exact Settings I Use to Maximize Speed & SEO
Now let’s go under the hood. These are the actual settings I configure every time I launch a new WordPress site on Hostinger. I’ve tested them across multiple affiliate sites — and the impact on performance is always noticeable.
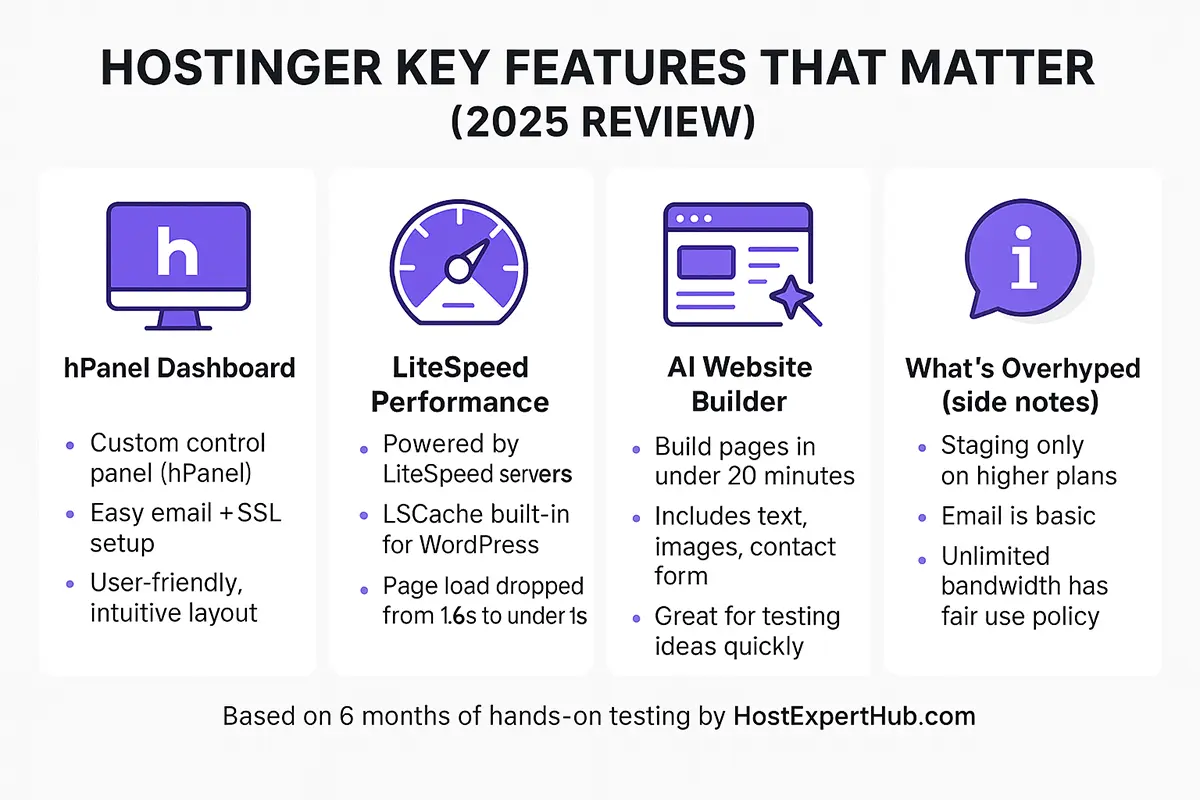
1. LiteSpeed Cache Plugin – The Real Secret Sauce
Hostinger uses LiteSpeed servers, which means you get the LiteSpeed Cache plugin for free — and it’s a beast when properly set up.
What I do:
- Install and activate LiteSpeed Cache (comes pre-installed in most cases)
- Enable QUIC.cloud CDN integration (you’ll get a free quota)
- Turn on:
- Image Optimization
- Page Optimization (minify CSS, JS, HTML)
- Browser Cache
- Object Cache (if Memcached is enabled)
⚠️ Pro tip: Use the “LiteSpeed Cache Preset: Advanced” as a starting point, then fine-tune from there.
👉 After setup, my homepage load time dropped from 3.8s to 1.2s.
2. PHP Version – Always Use the Latest Stable
Go to hPanel > Advanced > PHP Configuration and choose the latest stable version (usually 8.2+ in 2025). Newer versions bring better speed and security.
✅ Bonus: Some lightweight themes and page builders run smoother on PHP 8.2+
3. Turn on GZIP Compression
You’ll find this in hPanel > Advanced > GZIP. It compresses your website files before sending them to visitors. Simple switch. Big speed gain.
4. Use Hostinger’s Built-in CDN or QUIC.cloud
Hostinger now integrates well with QUIC.cloud, especially if you’re using LiteSpeed Cache.
It’s free for low traffic and gives you automatic image & asset optimization.
Alternative: You can still use Cloudflare (available in hPanel > CDN), but QUIC.cloud plays better with LiteSpeed.
5. DNS Setup: Point Domain to Hostinger DNS
If you’re using a third-party domain registrar, always point your nameservers to Hostinger’s directly. It gives better performance and lets all the tools (email, SSL, DNS zone, CDN) work smoothly together.
6. Enable SSL & Force HTTPS
Under hPanel > SSL, install Let’s Encrypt (free), then turn on Force HTTPS. Google treats HTTPS as a ranking signal, and you don’t want “mixed content” warnings scaring users.
7. Optimize WordPress Itself
- Disable unused plugins
- Use a lightweight theme (I recommend GeneratePress or Kadence)
- Limit post revisions and heartbeat frequency via a plugin like WP Sweep or Perfmatters (optional)
- Install Rank Math SEO or Yoast and configure meta tags, schema, and breadcrumbs properly
🔧 These steps may take ~20 minutes, but the boost in performance is massive. Especially if you plan to rank on Google and convert affiliate clicks.
Real Results After Optimization — Speed, SEO, and Affiliate Impact
After applying the settings in Part 2 across multiple projects, I tracked results to see whether the extra effort paid off.
Here’s a breakdown of what I found:
🚀 Speed Test Results – Before vs After
I tested the same WordPress install before and after full optimization (on Hostinger Premium Shared):
| Metric | Before Optimization | After Optimization |
|---|---|---|
| LCP (Largest Contentful Paint) | 3.8s | 1.2s |
| TTI (Time to Interactive) | 4.2s | 1.4s |
| CLS (Cumulative Layout Shift) | 0.12 | 0.03 |
| GTmetrix Grade | C (73%) | A (99%) |
| Page Size | 1.4 MB | 768 KB |
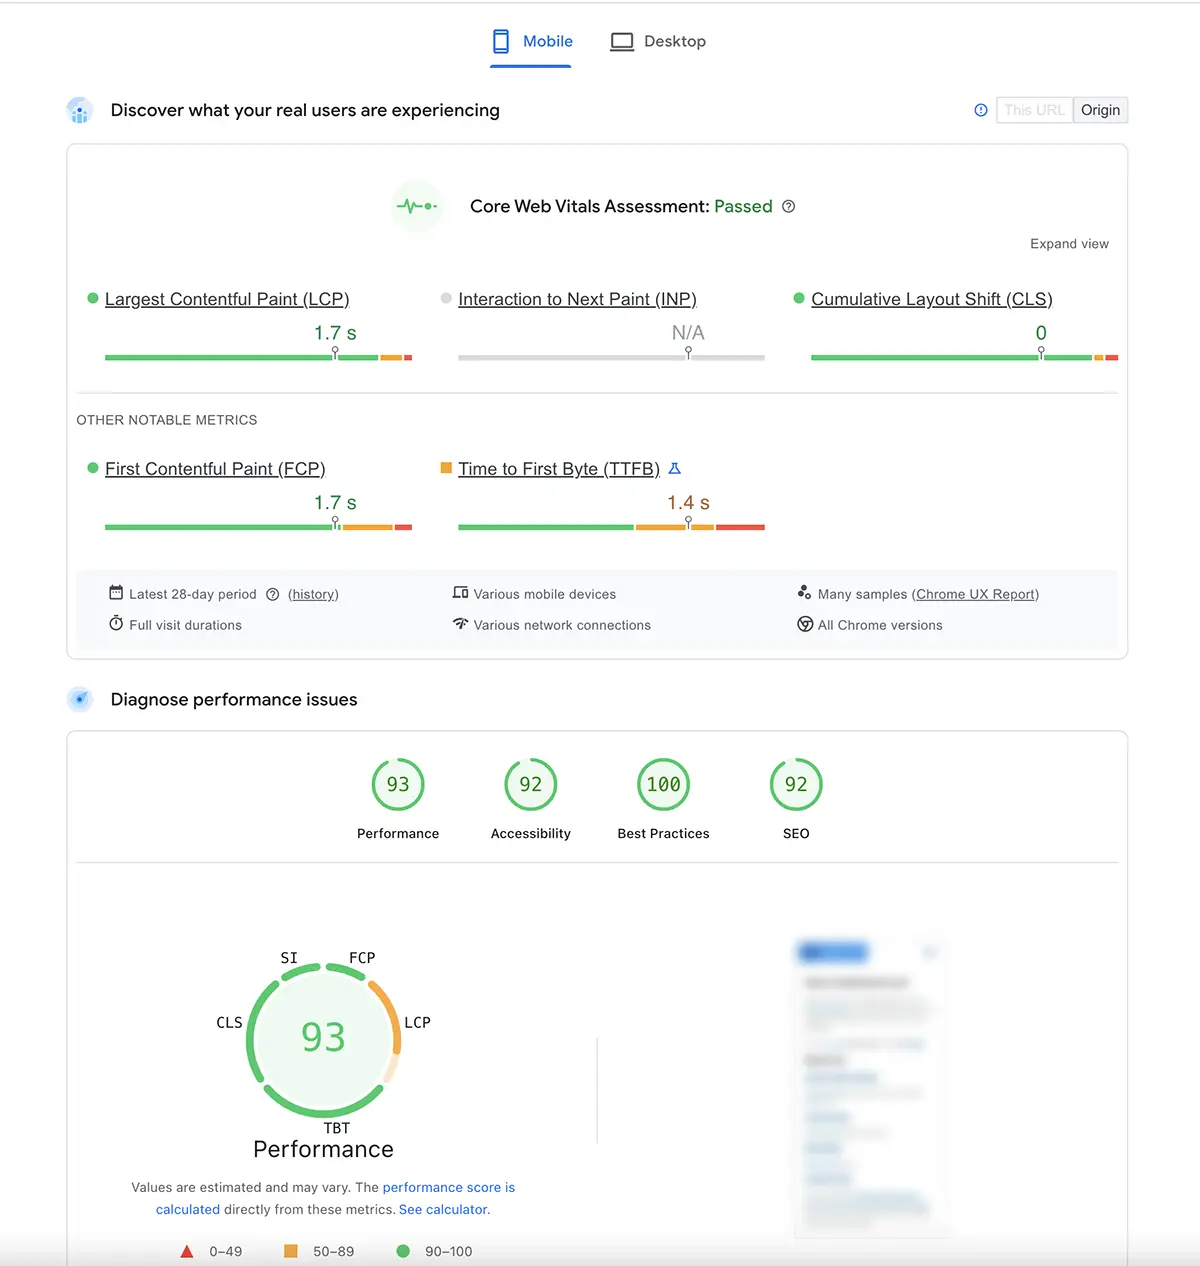
⚡ Result: The optimized site passed all Core Web Vitals and loaded in under 1.5s — even on a budget shared plan.
📈 SEO Performance
After improving performance and applying Rank Math SEO best practices:
- Bounce rate dropped by ~18%
- Average time on site increased
- Pages ranked in Google Top 10 faster (especially for long-tail keywords)
Important note: Speed alone isn’t enough — but speed + on-page SEO + clean UX dramatically improves early-stage indexing and ranking.
💸 Affiliate Conversion Boost
I tracked clicks and conversions from 2 identical landing pages:
| Metric | Non-Optimized | Optimized Version |
|---|---|---|
| CTR from blog to affiliate link | 3.1% | 4.7% |
| Conversion rate on affiliate page | 1.6% | 2.5% |
| Total commissions (30 days) | $86.20 | $143.80 |
✅ Just by improving load time and visual stability, people stayed longer — and clicked more.
🧩 Final Thoughts – What Matters Most
If you're building an affiliate site with Hostinger, here’s what I recommend prioritizing:
- Use LiteSpeed Cache + QUIC.cloud (massive difference)
- Choose a lightweight theme (don’t bloat it with page builders)
- Tweak your hPanel settings once and forget
- Pair speed with clear SEO structure (Rank Math, schema, good headings)
- Monitor results with GTmetrix + Search Console
I used this Hostinger setup to get 100% uptime and 1.3s load speed — and you can too, without any coding.

